


6 Signs You Need to Replace Your Pool Liner
Last updated 6/26/2023
Not sure if it’s time to replace your vinyl pool liner? You’ve come to the right place. From fading to leaks, we’re sharing some of the top signs it’s time to replace your vinyl swimming pool liner.
How long do pool liners last?
Generally, vinyl pool liners for above ground pools last about 6-12 years with proper maintenance. However, many factors can impact your above ground pool liner’s life expectancy, including frequency of use, proper maintenance, and weather.
When to Replace Your Above Ground Pool Liner
As promised, here are some key indicators that you might need a swimming pool liner replacement.
1. The vinyl liner is cracking or tearing.
Pool chemicals, the sun, and frequent use can all impact your liner over time. During your regular pool maintenance, you should inspect your liner for cracks and tears, which are generally signs of leaks and other big issues.
Pro tip: You may be able to repair rips, tears, and cracks in your liner, especially if you catch them early, rather than buying a replacement liner.
 2. The liner is leaking.
If you start to notice large decreases in your water level or abnormal algae buildup, you may have a leak. Leaks can occur due to ripped or torn areas of your liner, but that isn’t always the case and sometimes leaks can be hard to detect.
If you can find the source of the leak, you may be able to get away with using a patch and repair kit to fix it, but generally, you’ll need to replace your liner sooner rather than later.
3. There are wrinkles in your liner.
Occasionally, due to improper installation or general wear and stretching, you may notice some wrinkles in your pool liner.
Common areas for wrinkles are around returns and skimmers. Once they’re there, they can be nearly impossible to undo.
Dirt and debris can get caught in wrinkled areas, making them a prime spot for damage to your liner and impact the structural integrity of your liner. On top of that, most homeowners don’t find wrinkles to be very aesthetically pleasing.
4. Your liner has started to fade.
Exposure to chemicals and the sun’s UV rays can cause your liner to fade over time. Generally, this is more of an aesthetic issue than anything else. A bright new liner can do a lot to give your home and backyard a fresh, updated look. In general, fading does indicate that your liner is old or that there are chemical imbalances in your pool, which can lead to more serious issues down the road.
The good news is, there are some things you can do to help prevent fading on your pool liner, including:
- Using a pool cover to block the sun when not in use
- Using buildings and trees to block the suns rays
- Opting for organic cleaners and soft cleaning mitts that are safe for pool liners
5. Your liner is stained or discolored.
Again, this is more of an aesthetic issue than anything else. Chemicals, rust, minerals, and algae buildup can all cause staining on your swimming pool. There are some pool stain removers that can help, especially if stains are treated early.
However, if regular cleaning and pool maintenance doesn’t fix the issue, you may want to consider replacing your liner to improve the look of your pool and backyard.
 6. Liner slips out of the track.
As your beaded liner ages, it naturally loses its stretch and can start coming out of the coping track. This is also called “liner pull” and is a sure sign that your liner has reached the end of its life and needs to be replaced. Over time, this can start to impact the coping and lead to more expensive repairs.
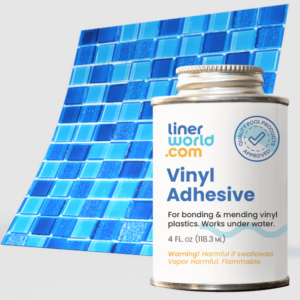
Get a replacement liner from LinerWorld
If it’s time to replace your pool liner, we are here for you. We have all sorts of unique and vibrant vinyl pool liners for your above ground pool — built to last and sold at affordable prices.
![]()

We’re planning to do what we can to get our pool back in good shape once we’re in the spring season. Reading about how the liner could be damaged at this point was a big help as it might be something we won’t be able to fix all on our own. I’ll go and ask a pool repair expert to help us with that kind of maintenance when the season comes.